Install IIS TLS certificates on the RSA KMS
You must create the IIS TLS server certificate and the IIS TLS CA certificate according to system requirements. The IIS TLS server certificate is installed into the Windows Personal Certificate store on the RSA KMS and the IIS TLS CA certificate is installed on all system servers.
Before you begin
Verify that the IIS TLS certificates are valid. For information about validating the certificates, refer to the Security Configuration Guide.
Procedure
-
Copy the IIS TLS customer-provided certificates to the RSA KMS.
-
Log on to the RSA KMS.
-
Make a <KMS_media_folder>\<IIS_TLS_cert_folder> directory for the IIS TLS customer-provided certificates.
-
Copy the customer-provided IIS TLS CA certificate and the IIS TLS server certificate to the <KMS_media_folder>\<IIS_TLS_cert_folder> folder on the RSA KMS.
-
-
On the RSA KMS, on the Start screen, click Search.
-
In the Search Apps box, type mmc.
-
Under the Apps Results for “mmc”, click mmc.
-
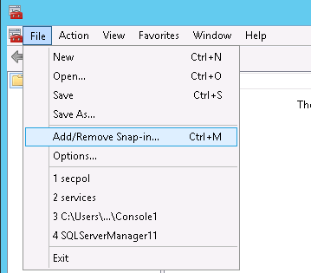
Click File > Add/Remove Snap-in.
-
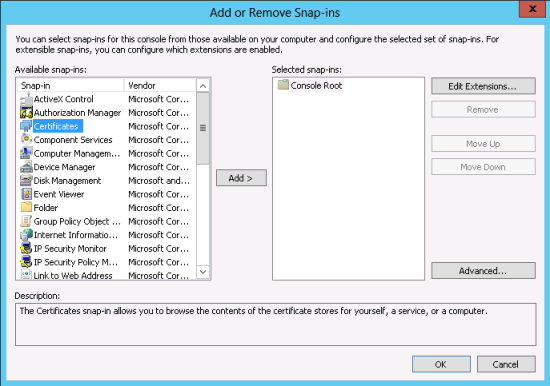
On the Add or Remove Snap-ins window, under the Available snap-ins section, select Certificates, and click Add.
-
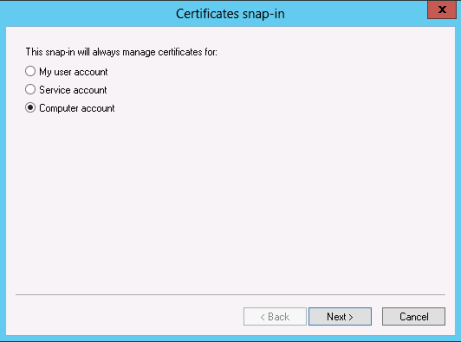
On the Certificates snap-in window, select Computer account, and click Next.
-
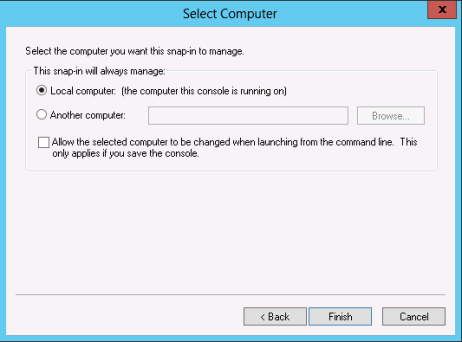
On the Select Computer window, select Local Computer, and click Finish.
-
Click OK.
The Add or Remove Snap-ins window is closed.
-
Under Console Root, expand Certificates.
-
Right-click Personal, and select All Tasks > Import.

-
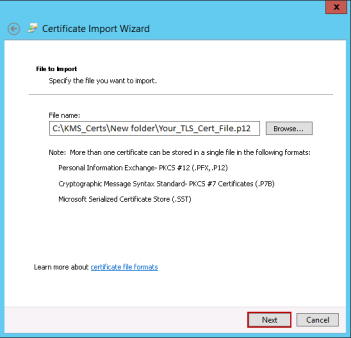
On the Certificate Import Wizard window, click Next.
-
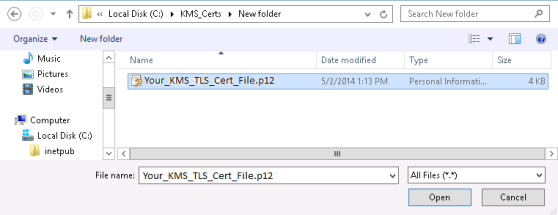
Browse to the <KMS_media_folder>\<IIS_TLS_cert_folder> folder.
-
Select All Files, and then select the customer provided IIS TLS server certificate in PKCS12 format.
-
Click Open.
-
Click Next.
-
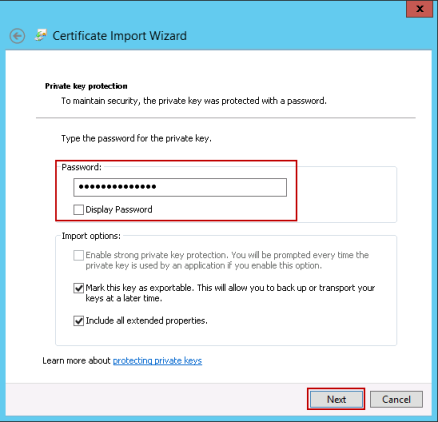
In the Password box, type the export password.
-
Select the Mark this key as exportable check box. This step is recommended, but is not required.
-
Click Next.
-
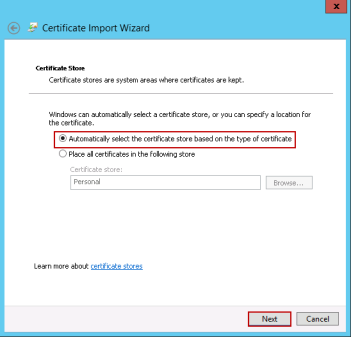
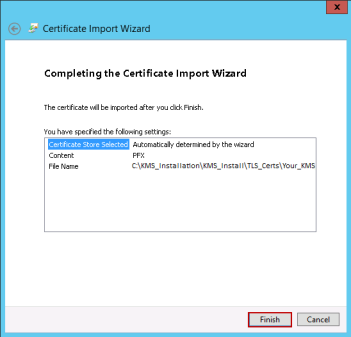
Select Automatically select the certificate store based on the type of certificate, and click Next.
-
-
To complete the import, click OK.
-
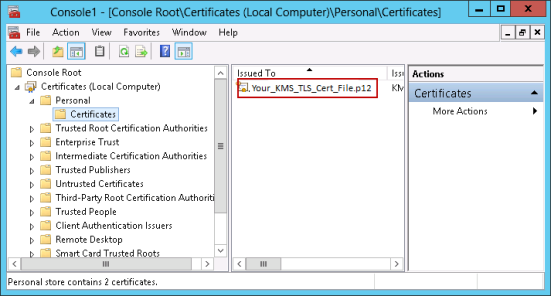
Make sure the IIS TLS server certificate is imported into the Personal store.
-
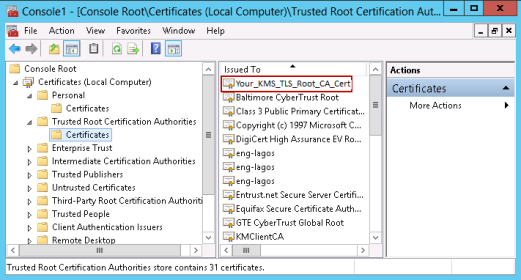
Make sure the IIS TLS CA certificate appears in the Trusted Root Certification Authority store. The CA certificate is imported automatically into the Trusted Root Certification Authority when the IIS TLS server certificate P12 file is imported into the Personal certificate store.
-
Save the Certificate snap-in for later use.