Create a Server-to-Server OAuth app for the Zoom Contact Center recording integration
Configure the Zoom Contact Center Center to authorize communications from the Verint Recorder. A Server-to-Server OAuth app allows the recording solution to integrate securely with Zoom APIs using an account owner access token without the need for user interaction or user authentication. One Zoom OAuth app can contain up to 10 event subscriptions, each with its own WebSocket URL. For 1+1 RIS redundancy, you need a single OAuth client and two event subscriptions.
All parameters, roles, and permissions listed in the procedure are the minimum required.
Procedure
-
Go to the Zoom App Marketplace and sign in with your Zoom user account.
-
In the upper right corner, select Develop, then Build App.
-
Under Server-to-Server OAuth, select the Create button.
If your organization integrates Zoom Meetings or Zoom Phone with the recording solution, create a separate OAuth App to subscribe to your Contact Center and User Activity events. Having a separate app avoids flooding the Zoom Contact Center CTI Adapter with Zoom meeting events or other unrelated events.
-
Enter an App Name. Each Recorder needs its own app, so choose something that uniquely identifies this application. For example, "Zoom OAuth for contact center recording".
-
Select Account-level app as the app type.
-
Select the Create button.
-
Under App Credentials, copy and save the Client ID and Client Secret to a text file. You need these values later in this procedure.
-
Enter a Redirect URL for OAuth, and enter this same URL under Whitelist URL. What you enter here depends on your organization. For example, you can choose to use your corporate website address. Later, during installation, Zoom appends a code to the end of this URL in the browser address bar.
-
Select Information. Enter the following:
-
Both a Short Description and Long Description.
-
Under Developer Contact Information, your Name and Email Address.
-
-
Select Features, enable Event Subscriptions, and then do the following:
-
Add an event subscription for the Recorder Integration Service (RIS) server that hosts the customer's Zoom Contact Center Adapter.
-
Give the subscription a name.
-
Choose the WebSocket method.
-
Select All users in the account.
-
Add the following events:
-
User Activity:
-
User has signed in
-
User has signed out
-
User's presence status has been updated
-
-
Contact center
-
Task created
-
Task completed
-
Task canceled
-
Task updated
-
Task deleted
-
Reservation created
-
User accepted reservation
-
User canceled a reservation
-
Reservation timed out
-
User completed a reservation
-
User rejected a reservation
-
User login
-
User logout
-
User status changed
-
Engagement consumer notified
-
Engagement user answered
-
Engagement consumer answered
-
Engagement user ended
-
Engagement consumer ended
-
Engagement user hold
-
Engagement user unhold
-
Engagement wrap up started
-
Engagement wrap up ended
-
Engagement transfer initiated
-
Engagement transfer queued
-
Engagement transfer reserved
-
Engagement transfer accepted
-
Engagement transfer rejected
-
Engagement transfer completed
-
Engagement transfer canceled
-
Engagement transfer timeout
-
Engagement started
-
-
-
Click Save.
-
Copy the WebSocket URL and give it to your Service Provider Administrator. They need the URL to configure the adapters.
-
Click Continue.
-
-
On the Add Scopes page, the following scopes are selected automatically:
-
View all contact center engagement information
-
View our contact center task information
-
Manage your contact center task information
-
View all contact center user's details
-
View and manage all contact center user's details
-
View all user information
-
-
Select Done, then select Continue
-
Under Activation, select Install.
-
Review the enabled settings and scopes, then select Authorize.
-
When you are redirected to the URL that you entered previously, copy and save the generated code from the address bar (that is, everything after "code=").
-
In the upper right corner, select Manage.
Your newly created app appears in the list of Created Apps.
-
Use the websocket endpoint URL to get the authorization tokens:
-
In Postman, make a POST request to the URL
https://api.zoom.us/oauth/tokenusing the following parameters:Key
Value
grant_type authorization_codecode Enter the code you copied in step 16. redirect_uri Enter the URL that you entered as the Redirect URL for OAuth in step 9. 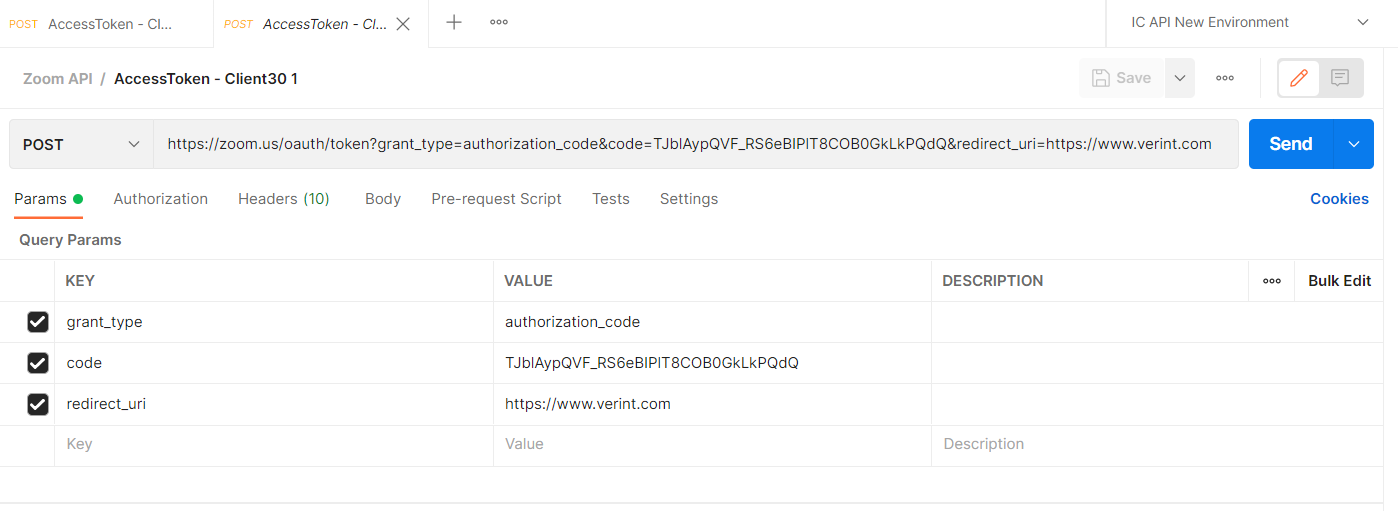
-
Select the Headers tab.
-
Add a header key called Authorization with a value in the format "Basic Client ID:Client Secret", where Client ID and Client Secret are the items copied in step 8, then encoded to Base64 format. Note the colon between the ID and the secret; be sure to include this colon before encoding.
Example:
bX3hG4UYSRyJWQ3zGn8otg:oGo4OZ2GYZbLiDBdQPIz3hH3vKIIOYAbbecomes the following after encoding,
IGJYM2hHNFVZU1J5SldRM3pHbjhvdGc6b0dvNE9aMkdZWmJMaURCZFFQSXozaEgzdktJSU9ZQWI=and you would enter the following as the Authorization value:
Basic IGJYM2hHNFVZU1J5SldRM3pHbjhvdGc6b0dvNE9aMkdZWmJMaURCZFFQSXozaEgzdktJSU9ZQWI= -
Select Send.
This action produces an Access Token and a Refresh Token
-
In the Response section, copy and save the Refresh Token to your text file.
Keep this text file as you need the Client ID, Client Secret, and Refresh Token when you create the Zoom Adapter.
What to do next
Create the Zoom Contact Center Data Source data source
Workflow: Set up real-time audio capture
Create a Server-to-Server OAuth app (Zoom developers)
Internal apps (Server-to-Server) (Zoom Developers)
Server-to-Server OAuth (Zoom Developers)