Authorize Recorder to access Genesys Cloud CX (OAuth) for text capture
Configure the Genesys Cloud CX Center to authorize communications from the Verint Recorder.
All parameters, roles, and permissions listed in this procedure are the minimum required for Verint to capture text messages between customers and configured agents in a Genesys Cloud CX BYOC environment.
Before you begin
-
Your Genesys Cloud CX organization and a Genesys Hub set up and running as expected so that your people can receive and send messages to your digital messaging channels.
-
The administrator of the integration and data actions has the following minimum permissions:
Integrations > Integration > Edit and View
Integrations > Action > Add, Delete, Edit, Execute, and View
Procedure
-
Sign in to Genesys Cloud CX with a user account that has administrator access to your
-
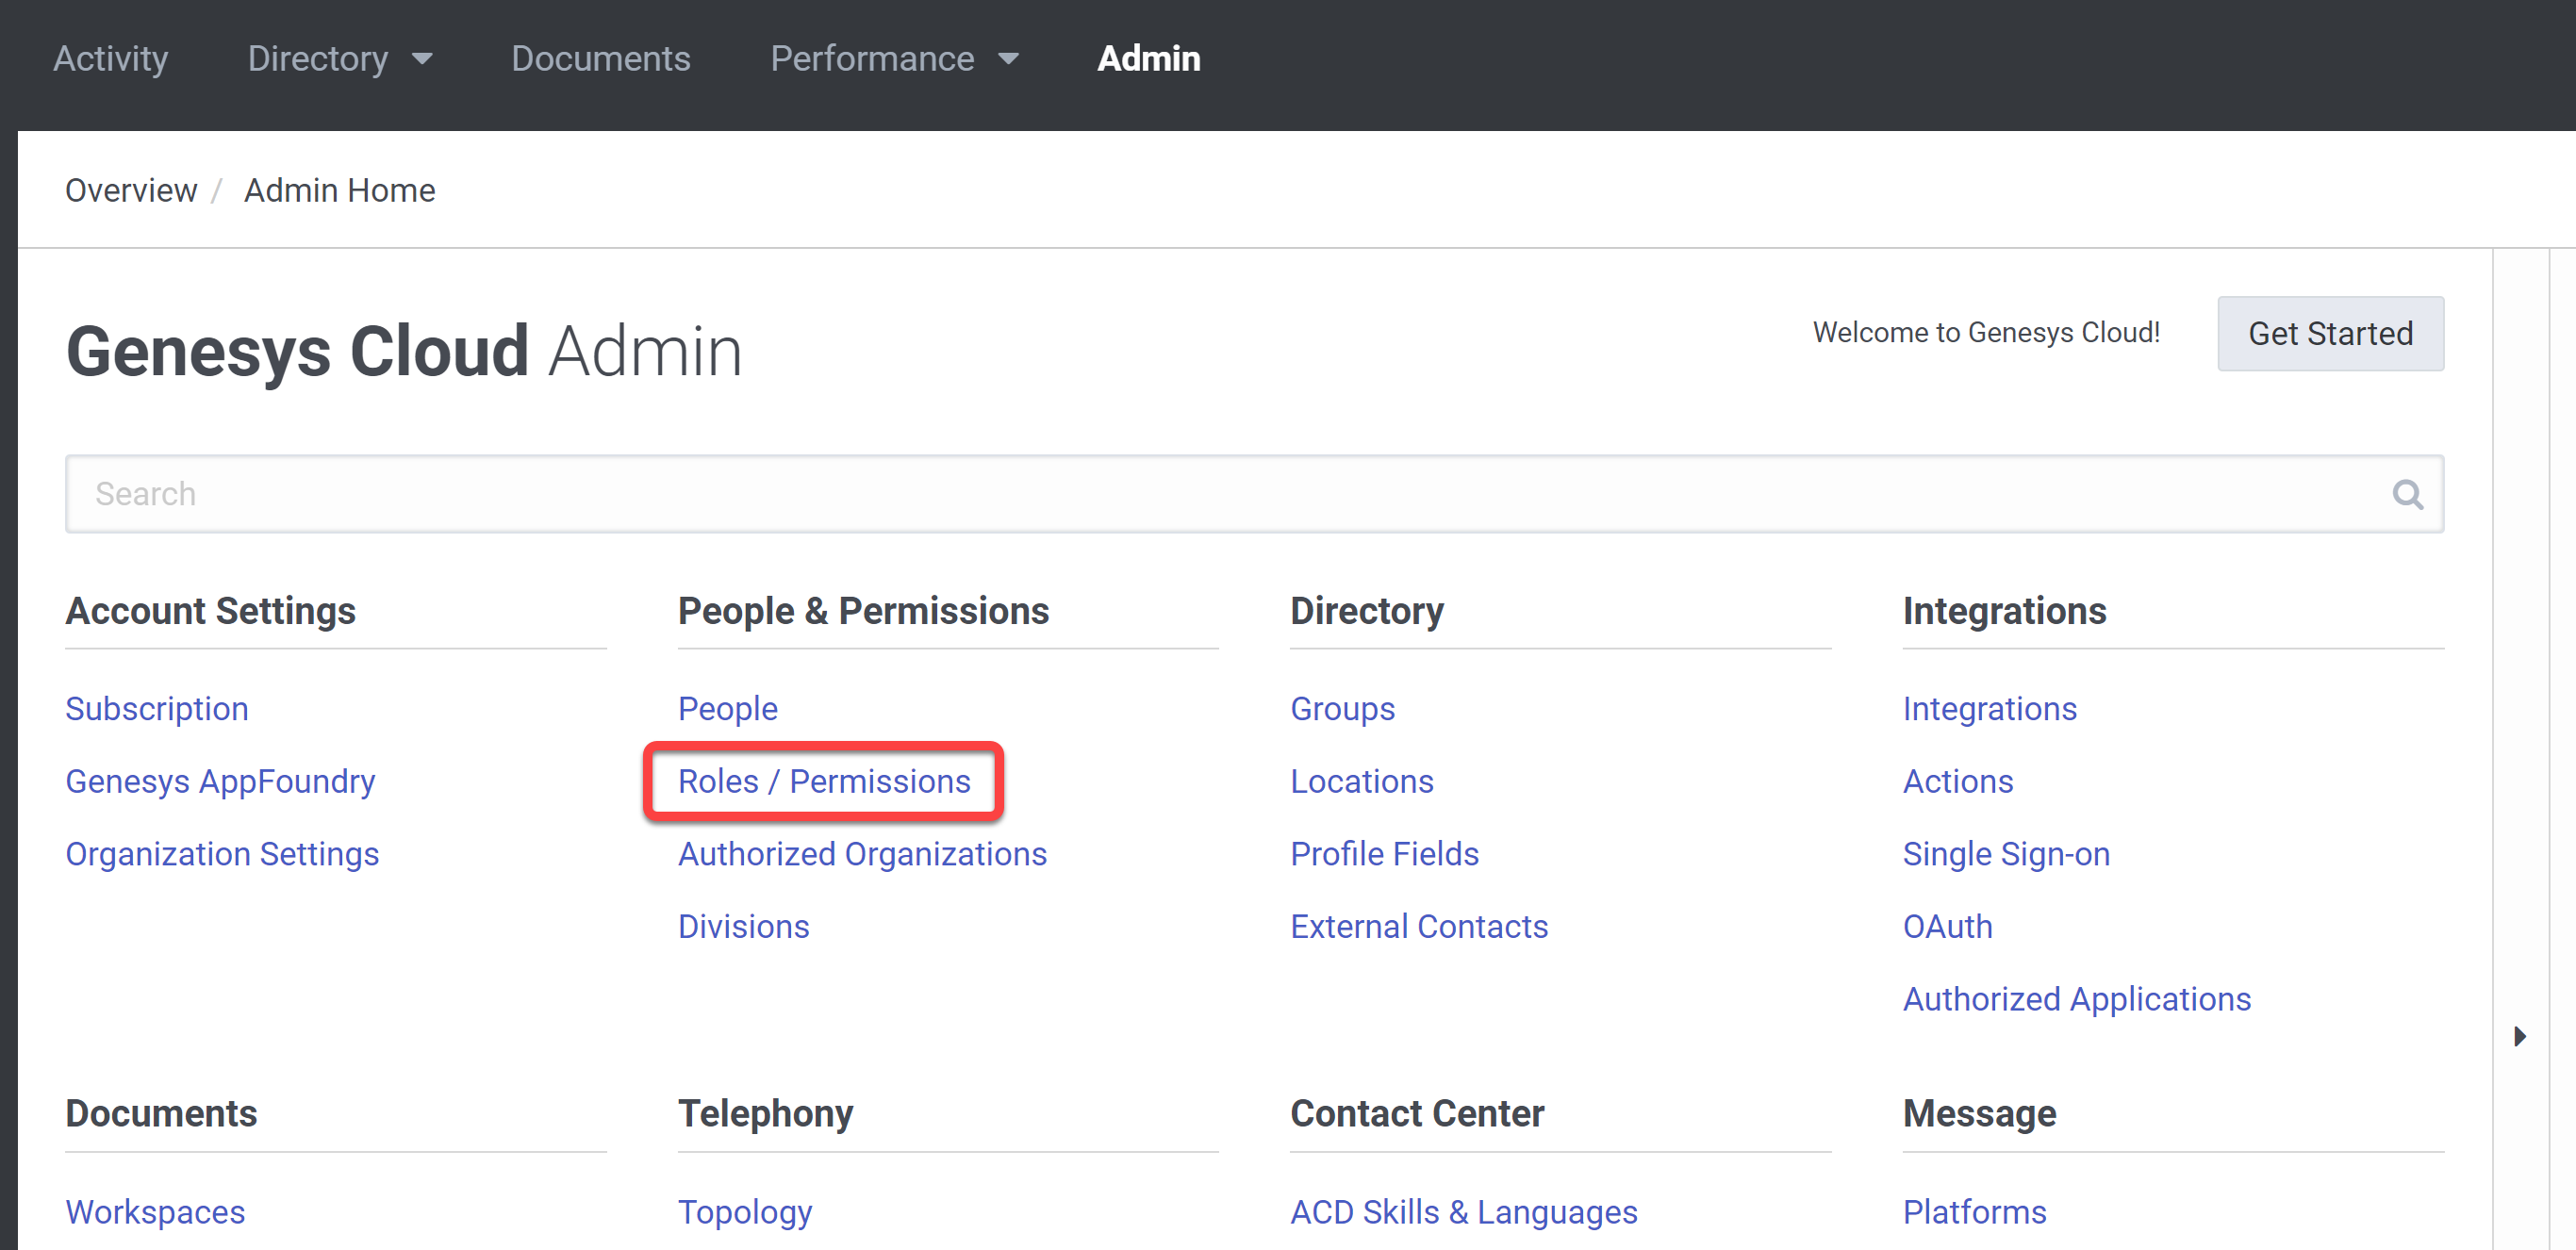
From the Genesys Cloud Admin home page, under People & Permissions, select Roles / Permissions.
-
On the Roles / Permissions, click Add role.
-
In the Roles Details page, give the role a unique name. Example: Verint Interaction Capture.
-
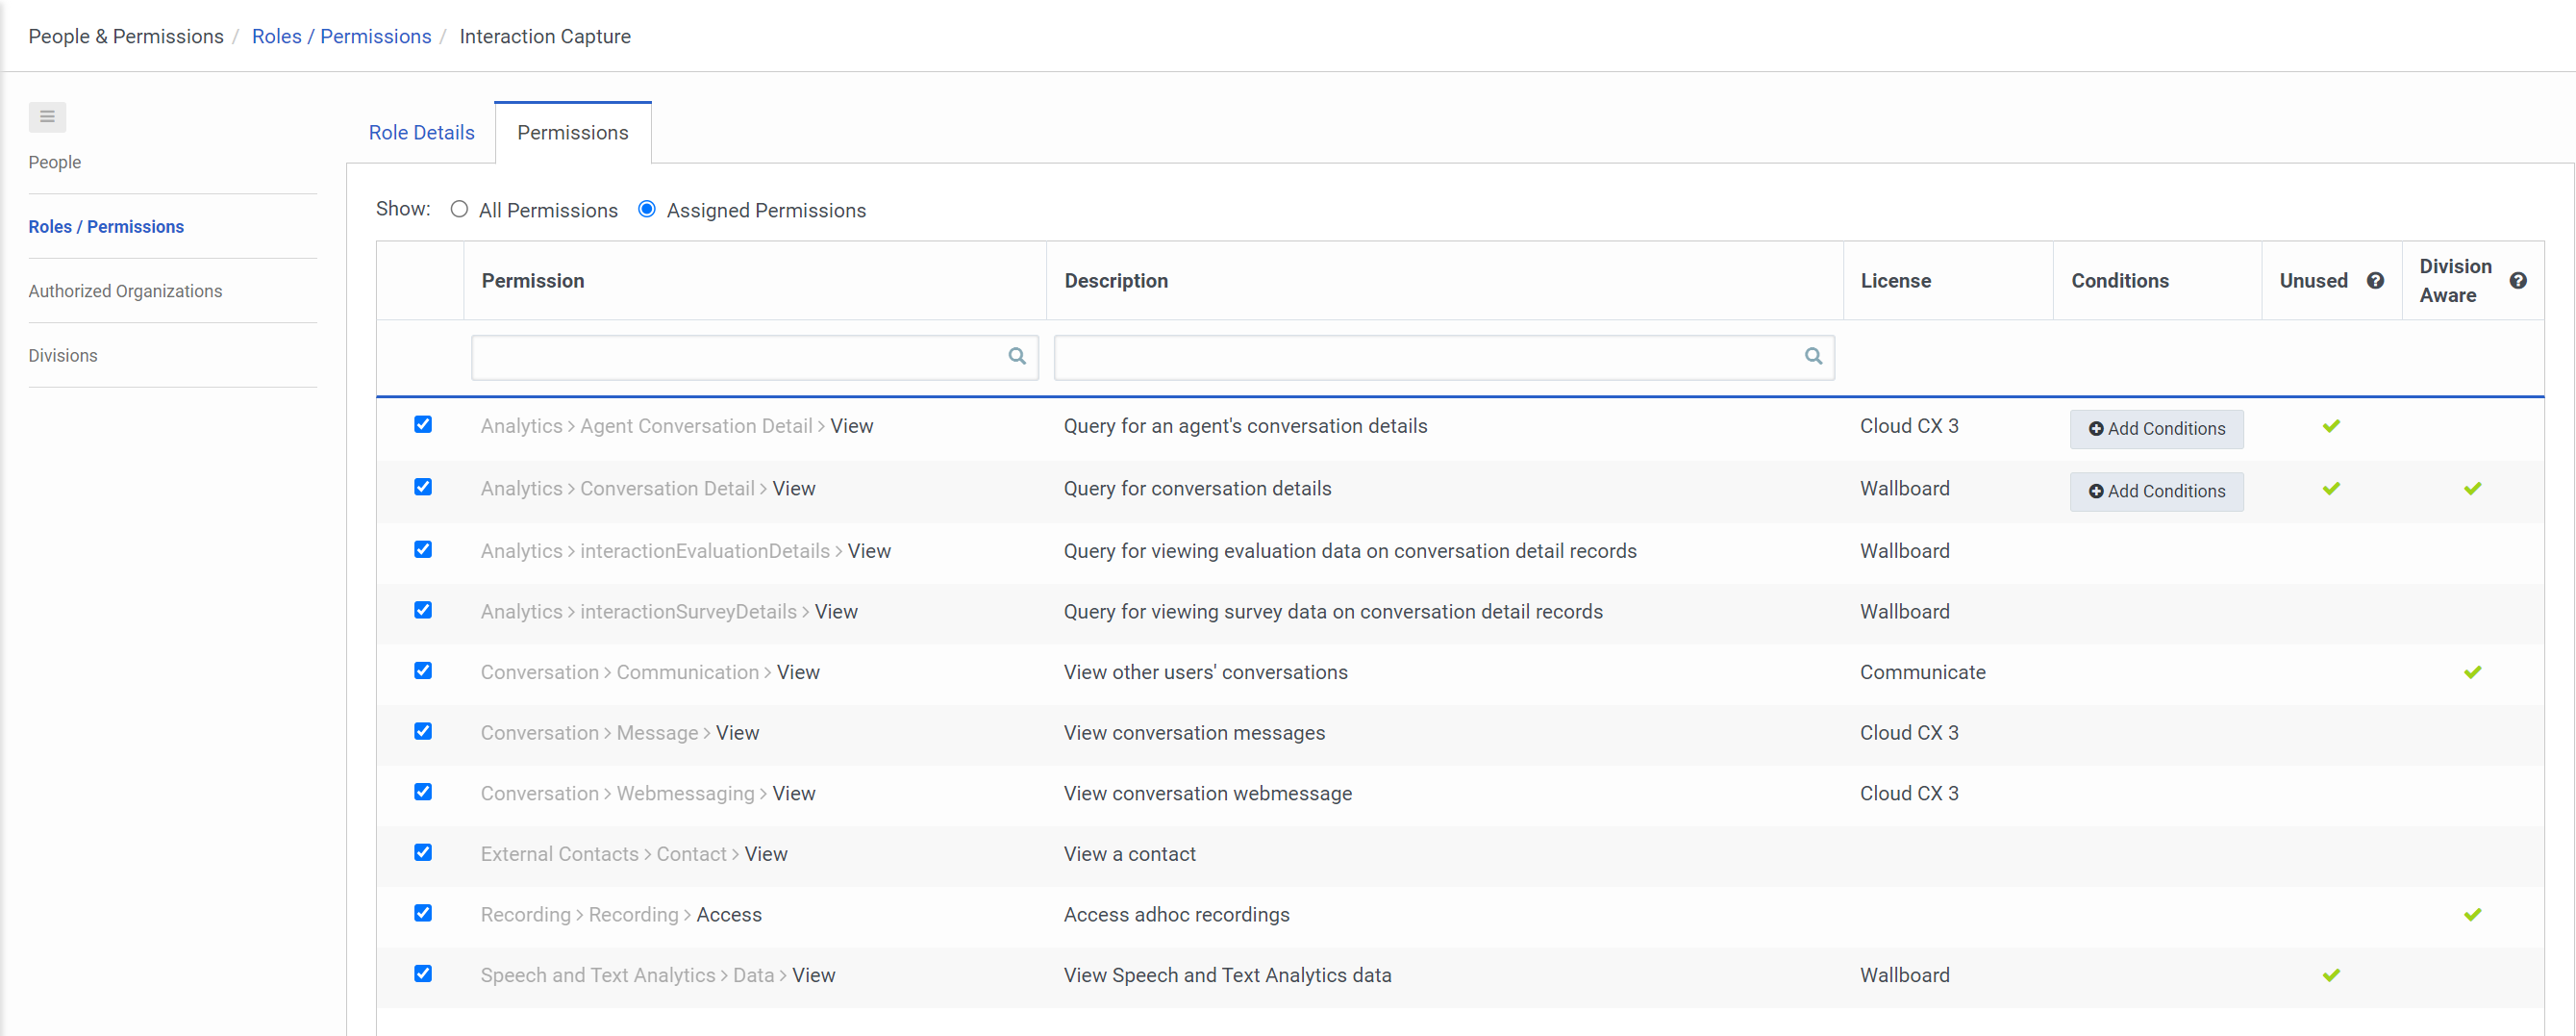
On the Permissions tab, add the following permissions:
-
Analytics > Agent Conversation Detail > View
-
Analytics > Conversation Detail > View
-
Analytics > InteractionEvaluationDetails > View
-
Analytics > InteractionSurveyDetails > View
-
Conversation > Communication > View
-
Conversation > Message > View
-
Conversation > Webmessaging > View
-
External Contacts > Contact > View
-
Recording > Recording > Access
-
Speech and Text Analytics > Data > View
-
-
Click Change Membership, and add the agents who will answer text messages.

-
Return to the Genesys Cloud Admin home page.
-
Under Integrations, select the OAuth page, then click Add Client.
-
Create a client application with the following settings:
App Name : Enter a unique name for this client application.
Token Duration: Select 86,400 seconds (default)
Grant types: Select Client Credentials.
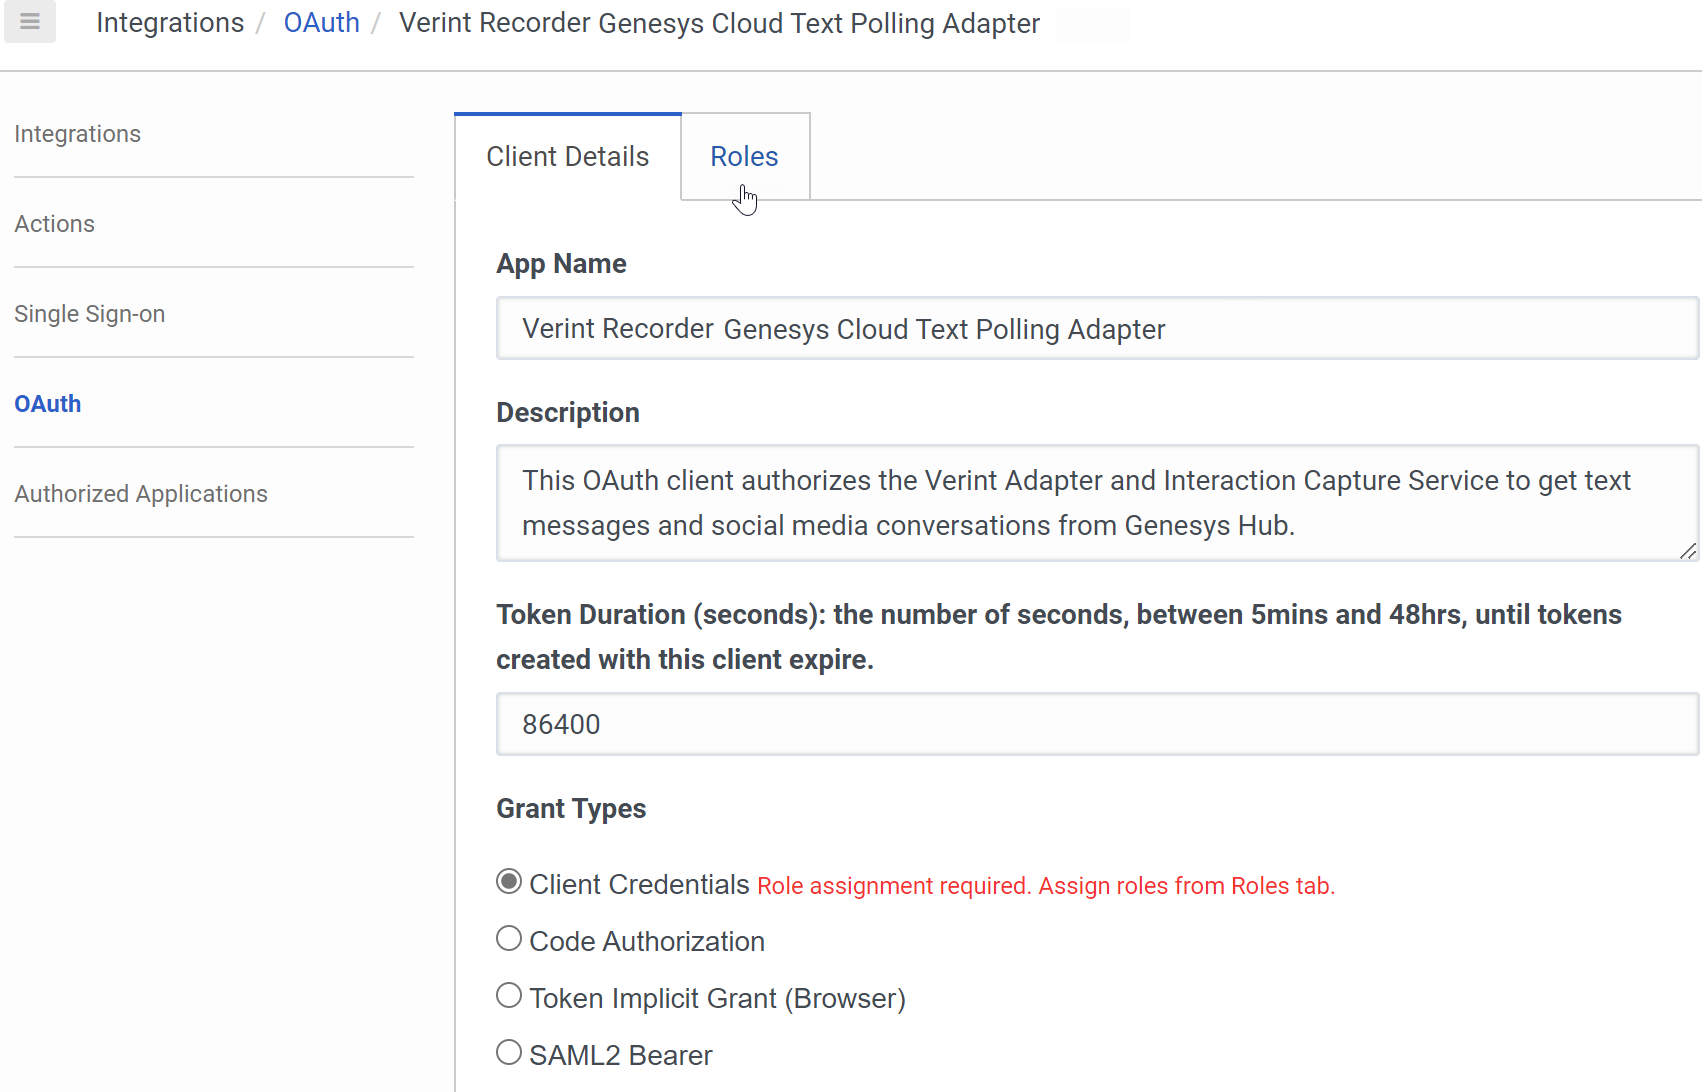
After selecting Client Credentials, the message "Role assignment required. Assign roles from the Roles tab" appears, and the Roles tab becomes available.
-
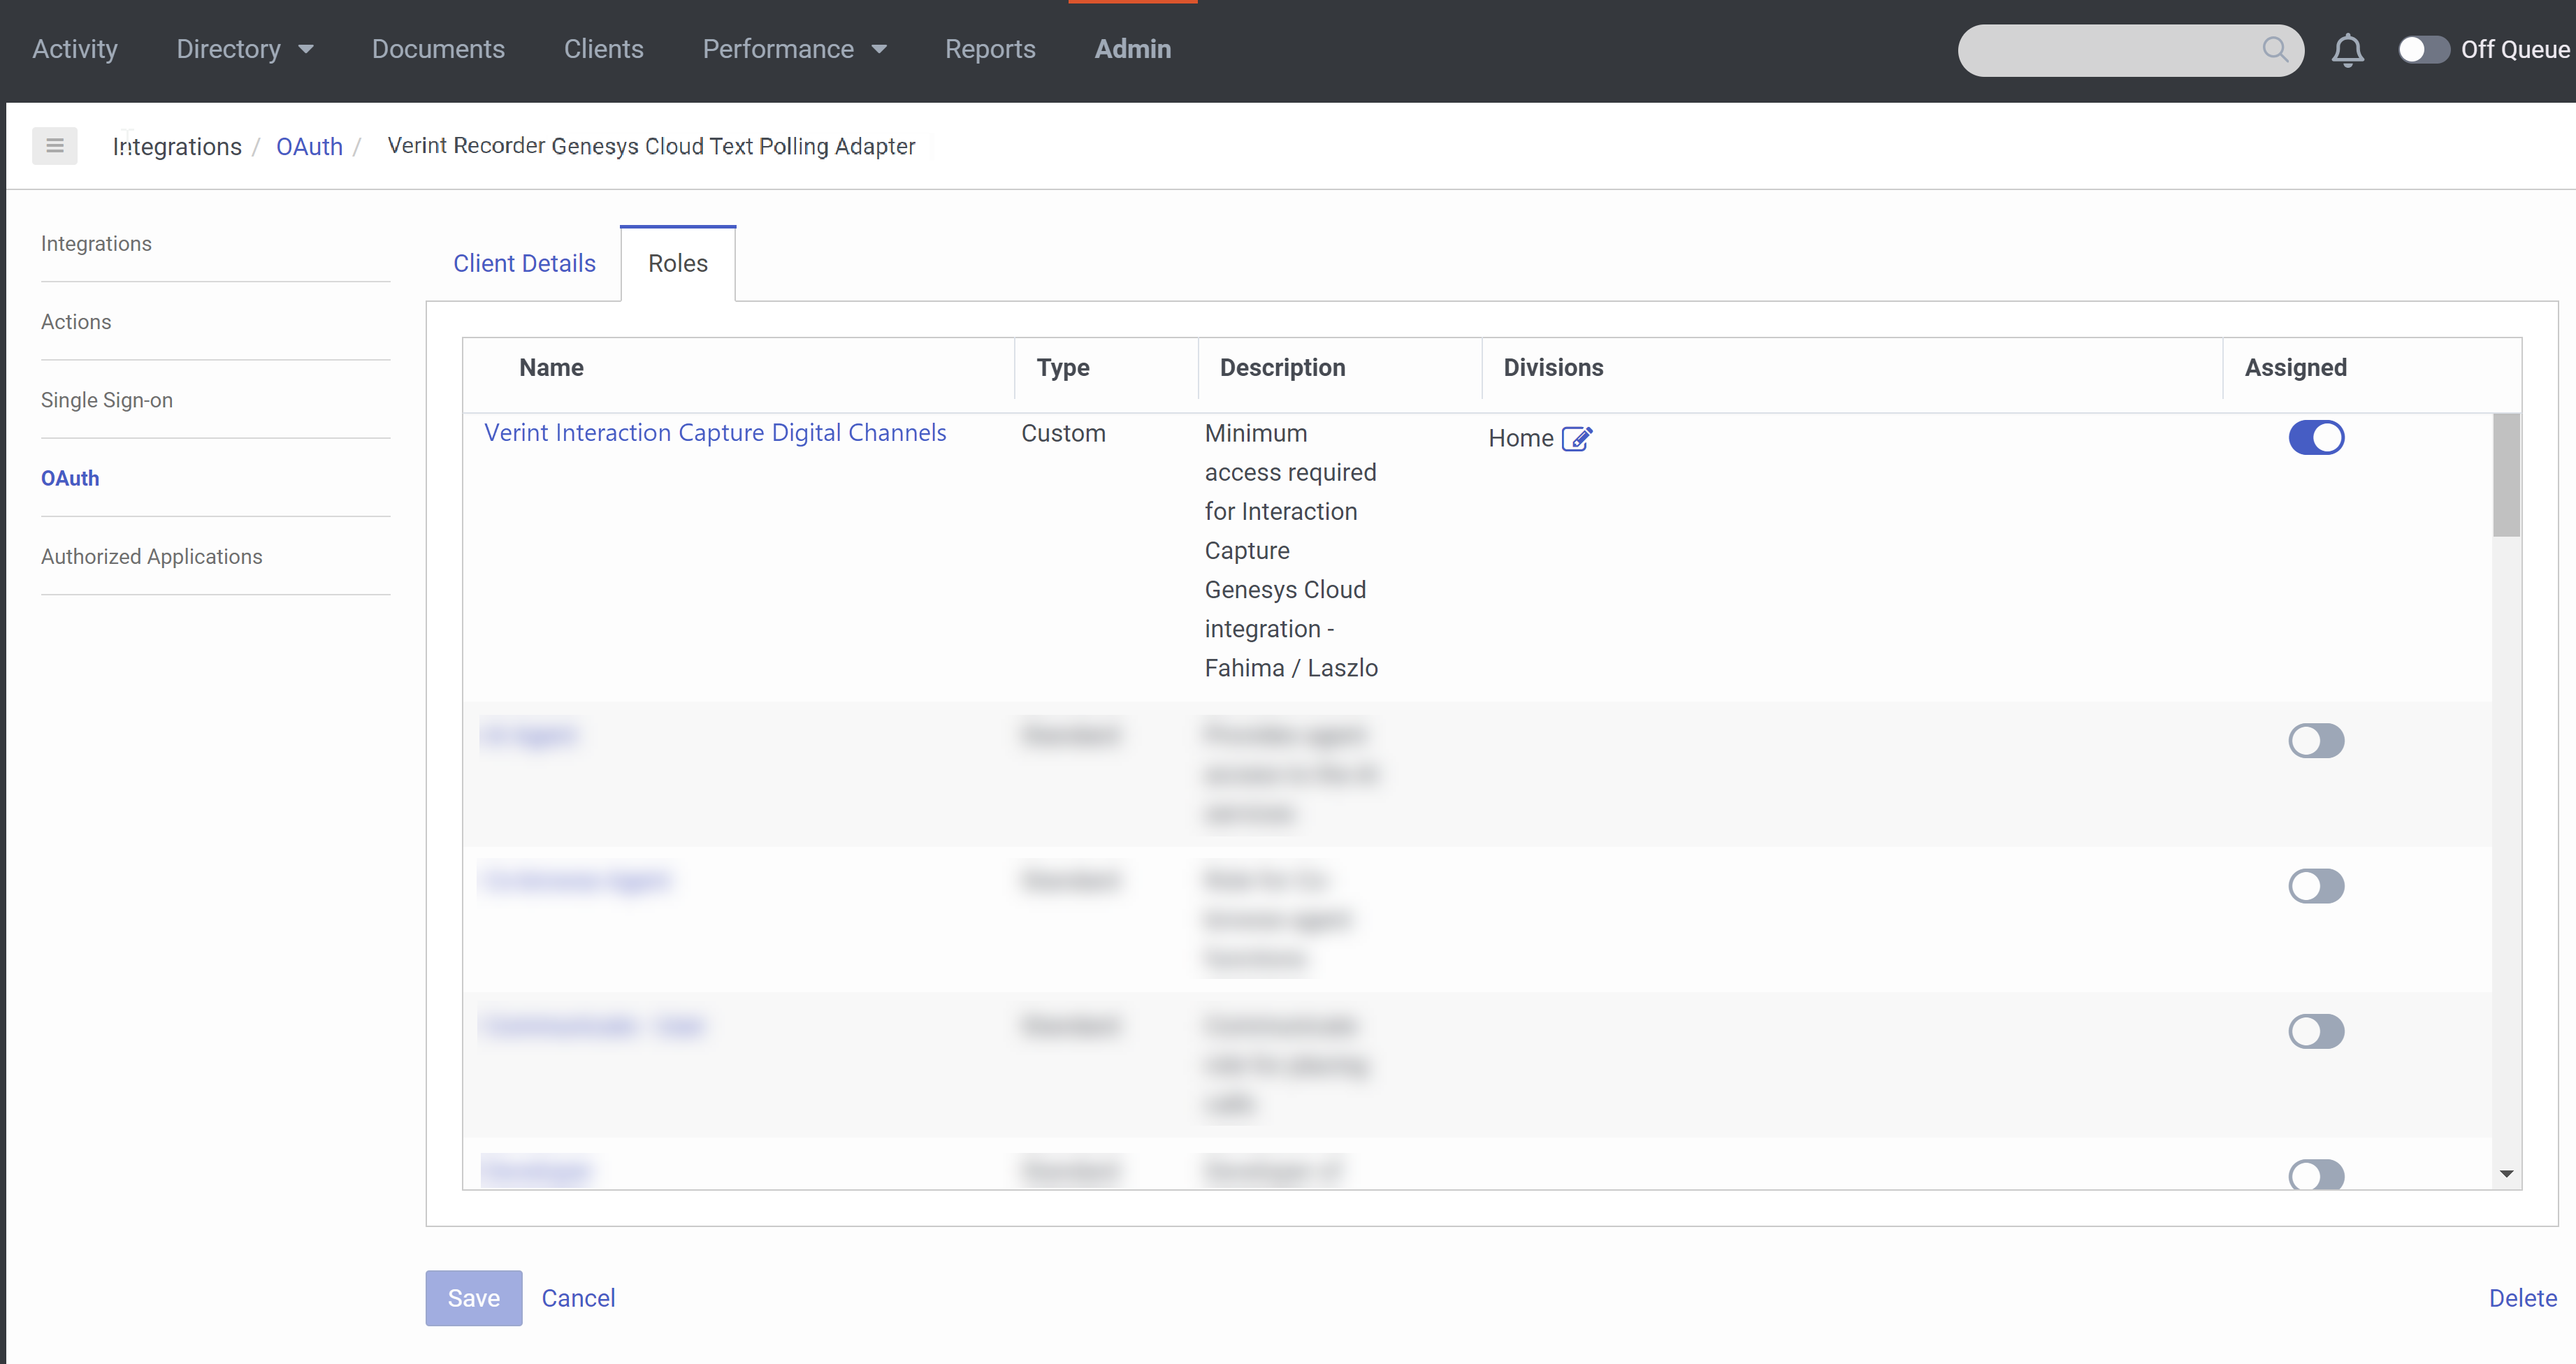
Click the Roles tab, and assign the role that you created earlier.
-
Click Save.
The system creates a Client ID and Client Secret.
-
Go to the Client Details tab, and copy the Client ID and Client Secret.
The Client ID and the Client Secret are required in the next step and later in the Verint system when configuring the Genesys Cloud CX Text Adapter.

-
Go to the Integrations page and create a Genesys Cloud data actions integration for web services:
-
Click Add an integration.
-
Install Genesys Cloud Data Actions.
-
On the Configuration tab, select Credentials, select Configure, and enter the client ID and secret of the OAuth client.
-
-
Go to the Actions page, and publish the following actions for the Genesys Cloud data action:
-
Get Estimated Wait Time
-
Get User Presence
-
Get User Routing Status
-
-
Go to the Authorized Applications page, click the Authorize a Client button, then enter the Client ID of the OAuth client for this Recorder.

-
Add the role created earlier to the authorized application.
-
Add the following Scopes to the authorized application:
-
Alerting
-
Alerting:readonly
-
Analytics
-
Analytics:readonly
-
Conversations
-
Conversations:readonly
-
Messaging
-
Messaging:readonly
-
Routing:readonly
-
User-basic-info
-
Web-messenger
-
Web-messenger:readonly
-
-
Approve and save the authorized OAuth client.
What to do next
Create a Genesys Cloud CX data source
Workflow: Configure text capture from Genesys Cloud CX
Requirements for Genesys Cloud data action integration (Genesys Cloud Resource Center).
About Genesys Cloud data actions integration (Genesys Cloud CX ResourceCenter)