Install the Plugin Player manually
Ensure all site preparation and system requirements are met before proceeding with the Plugin Player installation instructions. This application requires the mandatory resources contained in Desktop Resources.
Before you begin
-
Install Desktop Resources
-
Download the Plugin Player installation package, according to Obtain the installation packages.
Procedure
-
If a previous version of the Plugin Player is installed, remove it through Windows Control Panel.
-
To launch the Installation Wizard, do one of the following:
-
(recommended) If downloaded from the portal, double-click the KB<number>.msi file.
OR
-
If installing from the media, double-click PlaybackInstallation.msi.
-
-
On the Welcome page, click Next.
-
On the End-User License Agreement page, select I accept the terms in the license agreement, and then click Next.
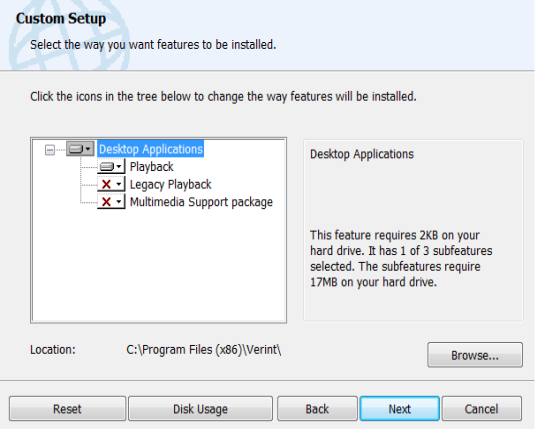
The Custom Setup page appears.
-
On the Custom Setup page, select the relevant features to install:
-
For a new installation:
Keep the default, Playback only. This option enables the Player in V15.2 systems. It is not required to make the Multimedia Support Package available for installation as the Plugin Player incorporates this package and installs it automatically.
-
For upgrade:
If upgrading from V11.2 and higher, keep the default which is Playback.
If upgrading from earlier versions such as V11.x, to enable the Player:
-
Select Playback and Legacy Playback.
-
Expand Legacy Playback and select Will be installed on local hard drive.
-
-
For downloaded media files:
Select only the MultiMedia Support Package option (clear the other options). Relevant when downloading audio files for playback on workstations outside the enterprise or on workstations that do not have access to the Portal Player.
-
Expand Playback and select Entire feature will be unavailable.
-
Expand MultiMedia Support Package and select Will be installed on local hard drive.
-
-
-
Select additional options as required:
-
Browse: Click Browse to change the default destination folder. The Browse button is enabled when Desktop Applications is selected.
-
Reset: Click Reset to revert to the default installation settings.
-
Disk Usage: Click Disk Usage to view the disk space required compared to the disk space on the destination drives.
-
-
Click Next.
-
If a list of missing prerequisites appears, click Close and then click Cancel. Install the prerequisite software and resume the installation.
When there are no missing prerequisites, the Playback Settings page appears.
-
If your system’s audio and screen files are not encrypted, click Next.
If your system’s audio and screen files are encrypted, set the playback encryption as follows:
-
Select Encrypted Playback.
-
In the Data Center Address field, enter the Application Load Balancer address.
-
Click Next.
-
On the Ready to install Playback page, click Install.
-
When the installation is complete, the InstallShield Wizard Completed page appears. Click Finish.
The Installer Information message appears prompting you to restart the computer.
-
Restart your computer.