Create a capture profile that captures text from Genesys Cloud CX
Create a capture profile to choose what types of interactions are recorded for your organizations and employees.Before you begin
Add employees to the Genesys Cloud CX data source
See the Available interaction types for text capture from Genesys Cloud CX
Procedure
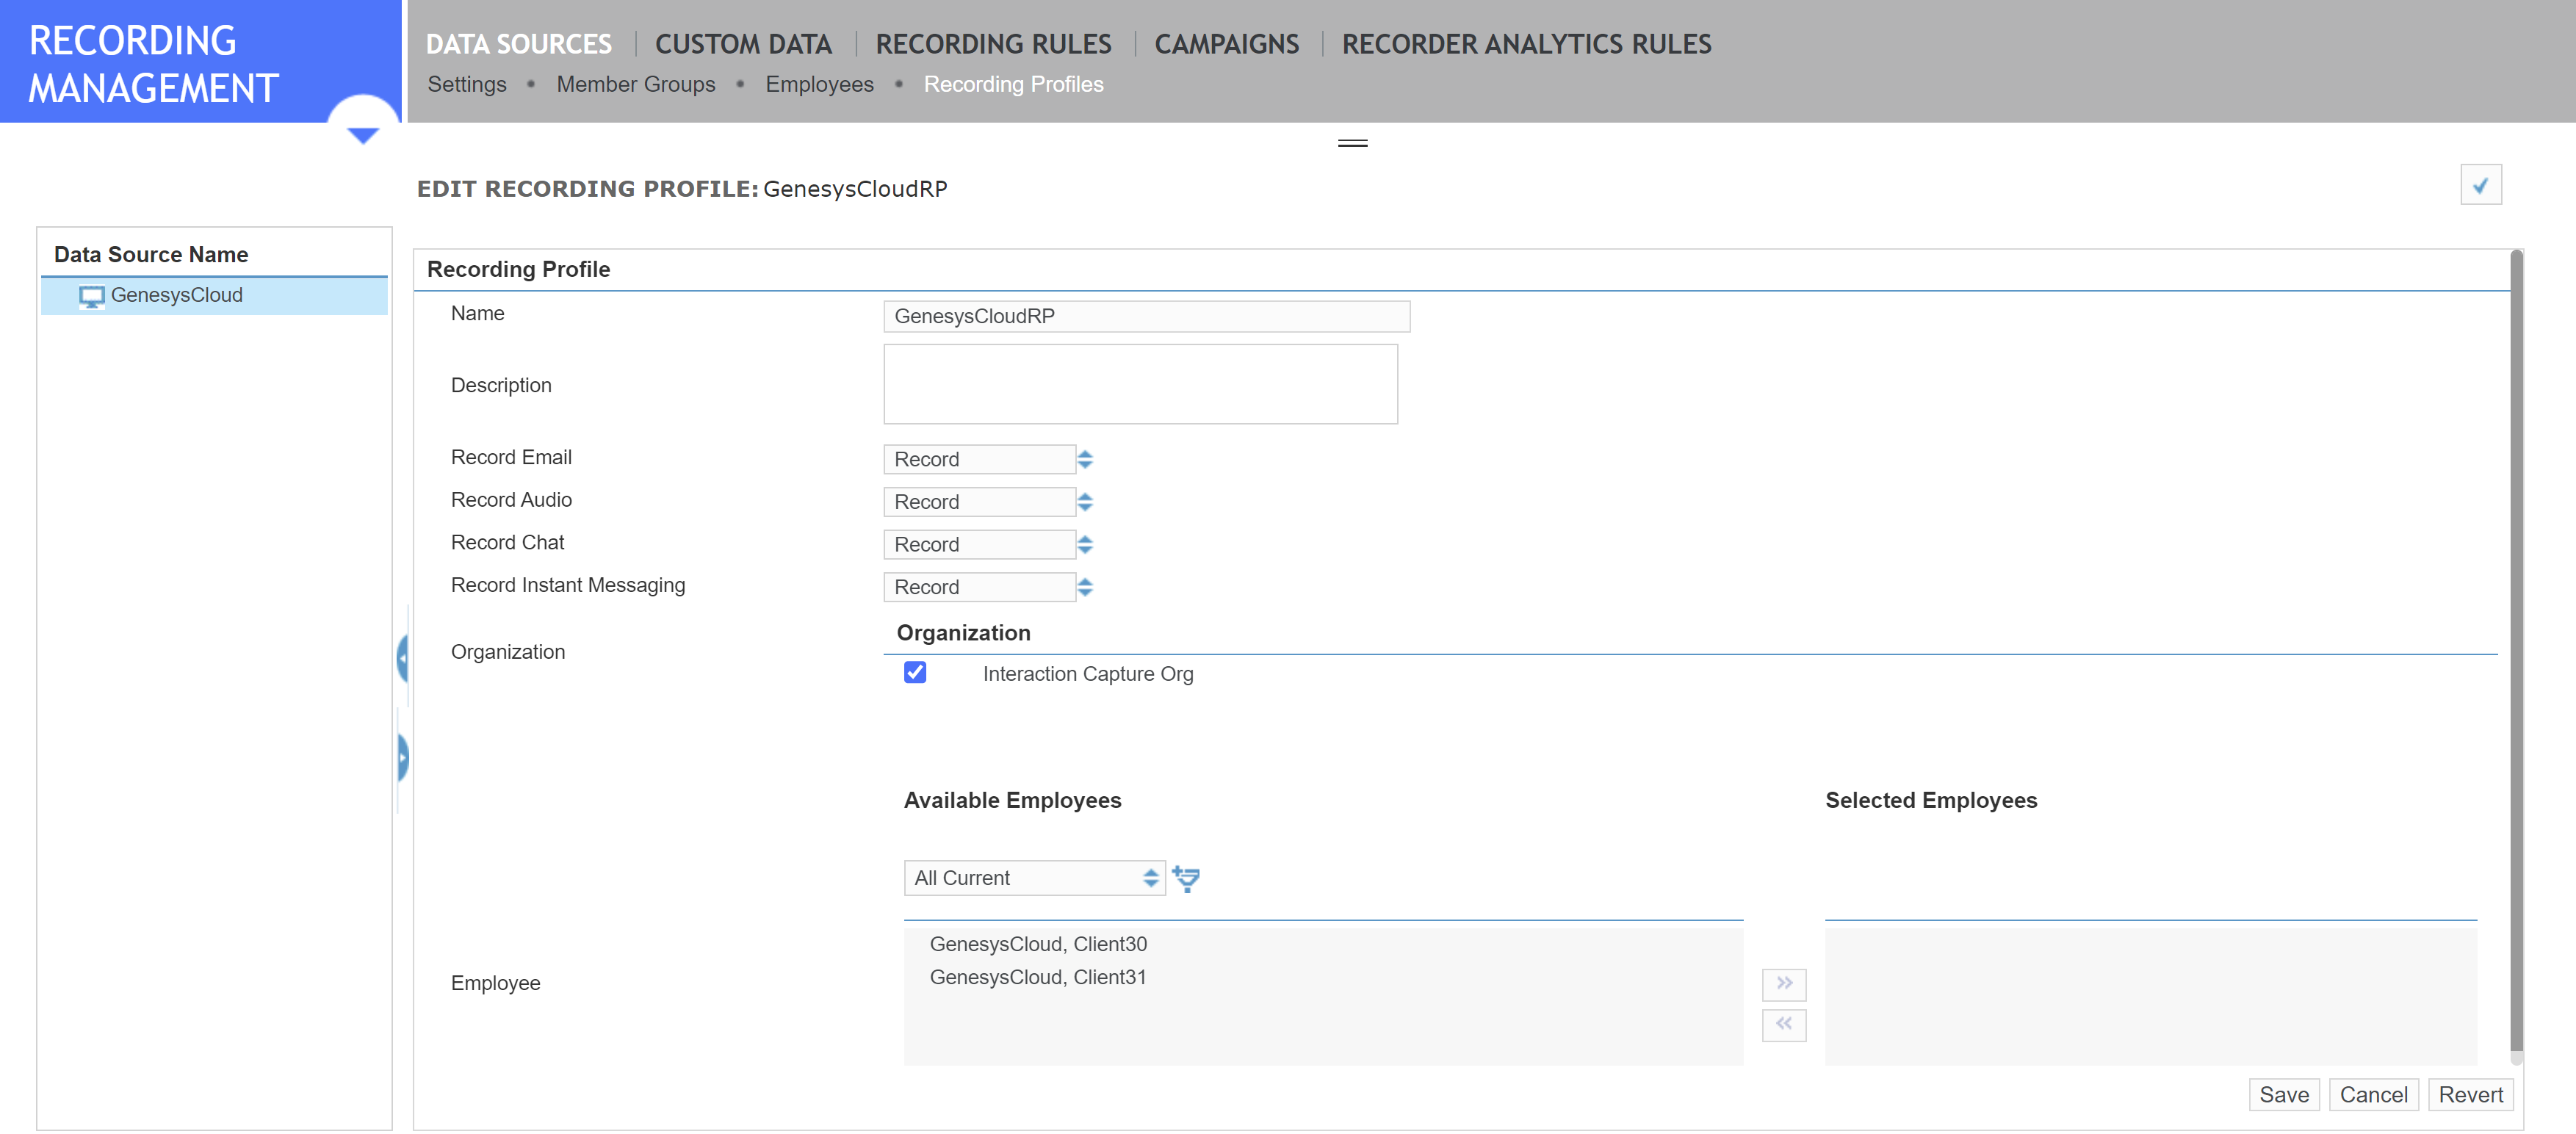
Go to Recording Management. Under Data Source, select Capture Endpoints.
In the Data Source column, select the Application (
 ) data source for the contact center.
Click Recording Profiles (in the gray bar at the top of the display).
Click Create.
Give the profile a name.
Enter a description (optional).
Choose what you want to capture.
Select a check box to enable capturing. Clear a check box to disable capturing.
Add organizations, employees, or both.
Organization: Organizations are created under Organization Management. You can add multiple Organizations to a single capture profile. Selecting a parent Organization automatically selects its children, but you can clear the child organizations individually.
Employee: Employees are set up under User Management. Select one or more employees from the left pane, then use the arrow buttons to move them to the right. If you have many employees, use the filter tool to narrow the selection.
Click Save.
What to do next
Create the adapter for text capture from Genesys Cloud CX
Create a capture profile that captures text from Genesys Cloud CX