Create a VM
Each VM that will host a Verint MS Teams Recording Bot Adapter needs to have a public IP address in Azure (ILPIP) and a CNAME record. The CNAME record belongs to the domain of your Microsoft tenant that is pointing to this public IP address. When a virtual machine is created, one Network Security Group (firewall) is automatically created and attached to the VM. You need to open the required ports on this Network Security Group.
Before you begin
-
Minimum Azure role: Virtual Machine Contributor
Procedure
-
Open the Azure management portal at https://portal.azure.com.
-
Go to Home > Virtual Machines,
-
Select Add.
-
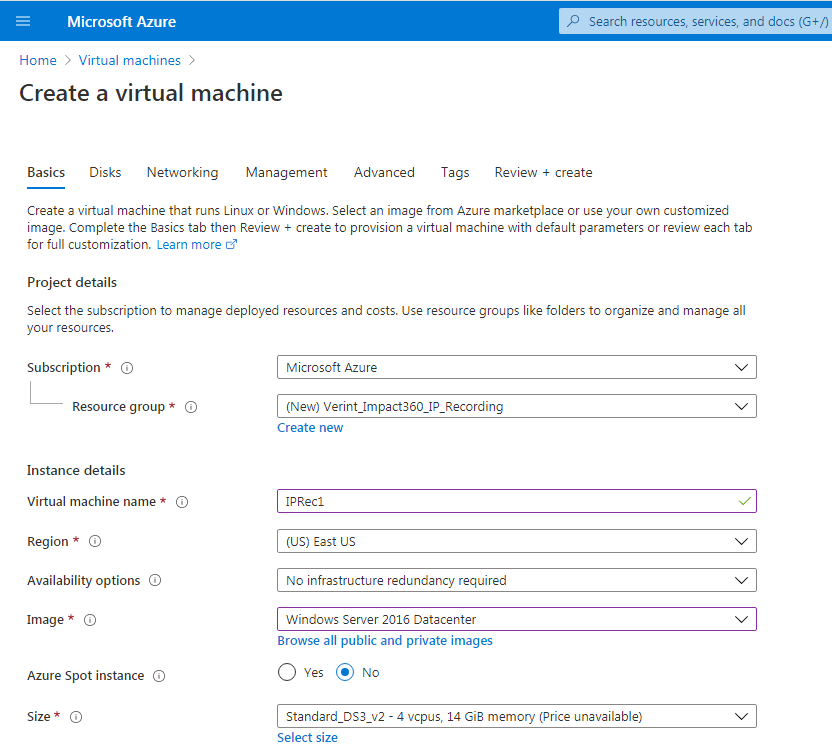
On the Basics tab, enter the Project Details. The starred items are required.
-
Select the Subscription.
-
Select a Resource Group.
-
-
On the Basics tab, enter the Instance Details. The starred items are required.
-
Enter the Virtual Machine name.
-
Select a Region. Use the nearest region to the location of the Microsoft Teams tenant.
-
For Image, select a Windows Server image, 2012 R2 or above.
-
Select the Size. Follow our sizing guide:
-
Standard_DS3_v2 - 150 channels
-
Standard_DS4_v2 - 300 channels
-
Standard_DS5_v2 - 600 channels
-
-
-
On the Basics tab, enter the details for the Administrator account.
-
Enter the Username.
-
Enter the Password.
-
To Confirm password, reenter the password.
-
-
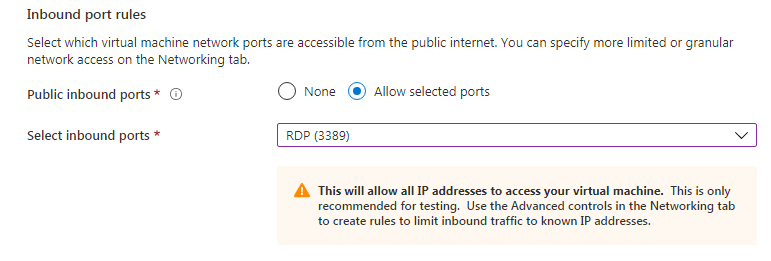
On the Basics tab, under Inbound port rules, allow the ports that are listed in Firewall ports.
-
On the Basics tab, under Save money, select a suitable Server license option.
-
On the Disks tab, configure disks as needed, according to the disk requirements in the Recorder Configuration and Administration Guide.
-
On the Networking tab, complete the settings as required:
-
Create a new Virtual network or use an existing resource group VNet.
-
Select a Subnet as needed.
-
If no public load balancers are created for the deployment, make sure that a static Public IP is created for the instance.
-
-
Select Review + create.
-
Select Create.
It takes a couple of minutes for Azure to prepare the new VM.
-
When the VM is deployed, select Go to resource.
-
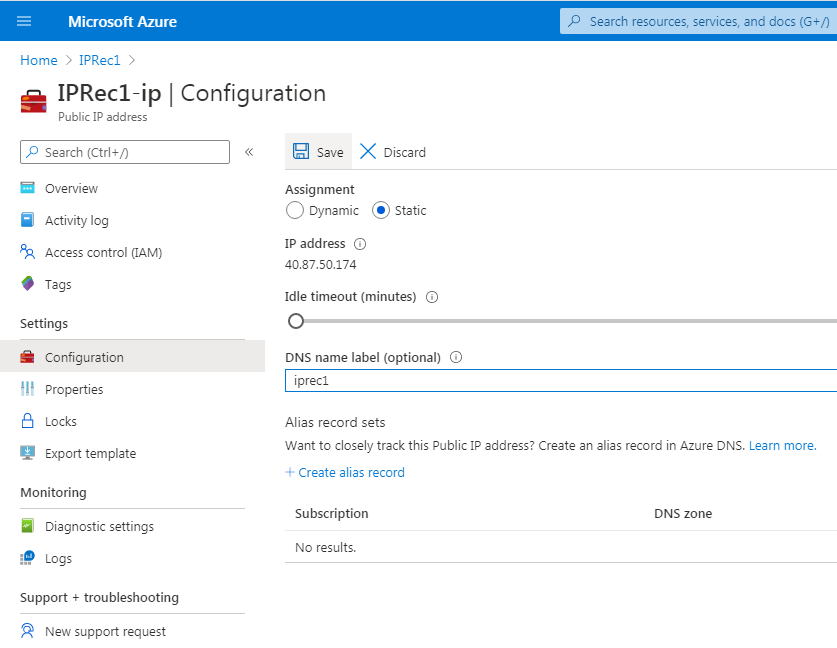
Configure the DNS name for the VM.
-
Add a DNS name label and select Save.
What to do next