Create the OAuth app
Configure the Zoom Meetings Center to authorize communications from the Verint Recorder.
All parameters, roles, and permissions listed in the procedure are the minimum required.
Before you begin
-
Install the Postman platform to help you create a post request and create required tokens during the procedure.
Procedure
-
Go to the Zoom App Marketplace and sign in with your Zoom user account.
-
In the upper right corner, select Develop, then Build App.
-
On the Basic Information page, under Development, enter a App Name. Each Recorder needs its own app, so choose something that uniquely identifies this application. For example, "Zoom OAuth - Rec1".

-
Select Admin-managed.
-
Under App Credentials, copy and save the Client ID and Client Secret to a text file. You need these values later in this procedure.
-
Enter a Redirect URL for OAuth, and enter this same URL under Whitelist URL. What you enter here depends on your organization. For example, you can choose to use your corporate website address. Later, during installation, Zoom appends a code to the end of this URL in the browser address bar.
-
Select continue until you reach Add Scopes page.
-
Select the Add Scopes button.

-
Add the following scopes for your app:
-
Under Recording, select View all user recordings and Get an account's archived meeting or webinar files.

-
Optional. For specific meeting recovery, under Recording, select View an archiving recording and Get an account's archived meeting or webinar files.

-
Under User, select View all users information and View a user.

-
-
Select Continue, then select Add App Now.

-
Under Activation, select Install.
-
Review the enabled settings and scopes, then select Authorize.
-
When you are redirected to the URL you entered previously, copy and save the generated code from the address bar (that is, everything after "code=").
-
In the upper right corner, select Manage.
Your newly created app appears in the list of Created Apps.
-
In Postman, make a POST request to the URL
https://api.zoom.us/oauth/tokenusing the following parameters:Key
Value
grant_type authorization_codecode Enter the code you copied in step 16. redirect_uri Enter the URL that you entered as the Redirect URL for OAuth in step 9. 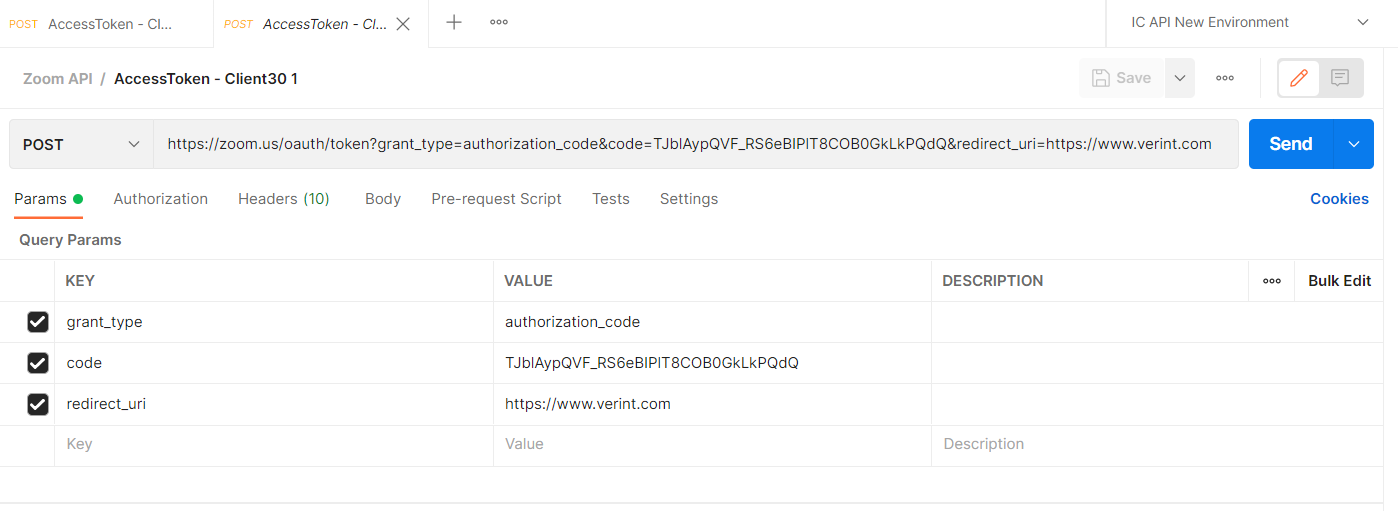
-
Select the Headers tab.
-
Add a header key called Authorization with a value in the format "Basic Client ID:Client Secret", where Client ID and Client Secret are the items copied in step 8, then encoded to Base64 format. Note the colon between the ID and the secret; be sure to include this colon before encoding.
Example:
bX3hG4UYSRyJWQ3zGn8otg:oGo4OZ2GYZbLiDBdQPIz3hH3vKIIOYAbbecomes the following after encoding,
IGJYM2hHNFVZU1J5SldRM3pHbjhvdGc6b0dvNE9aMkdZWmJMaURCZFFQSXozaEgzdktJSU9ZQWI=and you would enter the following as the Authorization value:
Basic IGJYM2hHNFVZU1J5SldRM3pHbjhvdGc6b0dvNE9aMkdZWmJMaURCZFFQSXozaEgzdktJSU9ZQWI= -
Select Send.
This action produces an Access Token and a Refresh Token
-
In the Response section, copy and save the Refresh Token to your text file.
Keep this text file as you need the Client ID, Client Secret, and Refresh Token when you create the Zoom Archive Polling Adapter.
What to do next
Create the Zoom Meetings data source